Table of Contents[Hide][Show]
How to bottle homemade fermented beverages for extra carbonation, bubbles, and fizz on par with commercial sodas. This secondary fermentation provides extra probiotics and enzymes too!
If you’ve been reading this blog for any length of time, you know that I am a big advocate of probiotic fermented beverages.
A survey of ethnic drinks from around the world reveals that enjoyment of the unique, health-boosting refreshment furnished by traditionally fermented beverages is nearly universal.
These drinks are the healthy sodas of old, minus the additives, chemicals, GMO high fructose corn syrup, and artificial colors and flavors.
Plain water pales in comparison to the effective manner in which a homemade soda or fermented drink quenches thirst after a sweaty round of yard work, exercise, or adventure in the outdoors through rapid replacement of lost electrolytes.
Traditional beverages also promote the thorough digestion of food by supplying additional enzymes when sipped with meals.
When carefully made with quality ingredients, alcoholic fermentation is replaced with lacto-fermentation with complex flavors and a slight effervescence the enjoyable result.
With nearly all ancestral cultures boasting at least one delicious, artisanal fermented beverage made from the local bounty of the fields, the modern addiction to sugar and synthetically sweetened sodas suggests that our desire for a bubbly drink is a most basic and primal need.
Homemade fermented beverages are indeed the answer to the modern addiction to soda!
Primary Fermentation
If you haven’t yet embarked on a fermented beverage adventure in your kitchen, there are numerous how-to’s on this blog to help you get started or expand your repertoire as needed.
Here are a few of the recipes and video lessons I’ve posted over the years to give you some ideas:
- Hindu Lemonade
- Switchel
- Beet Kvass
- Orangina (fermented orange juice)
- Water Kefir
- Basic Homemade Kombucha
- Ginger Ale
- Advanced Kombucha Brewing
- Root Beer
Extra Carbonation
While all of these beverages will yield a satisfying, slightly effervescent drink, some people find that they want more fizz.
This is especially the case for those attempting to break a commercial soda habit.
This is possible, but an extra step…bottling…is necessary to produce extra carbonation.
Bottling is a secondary fermentation that adds not only high levels of fizz, but extra probiotics and enzymes too!
This will achieve a level of bubbliness comparable to store soda.
A successful secondary fermentation involves knowing:
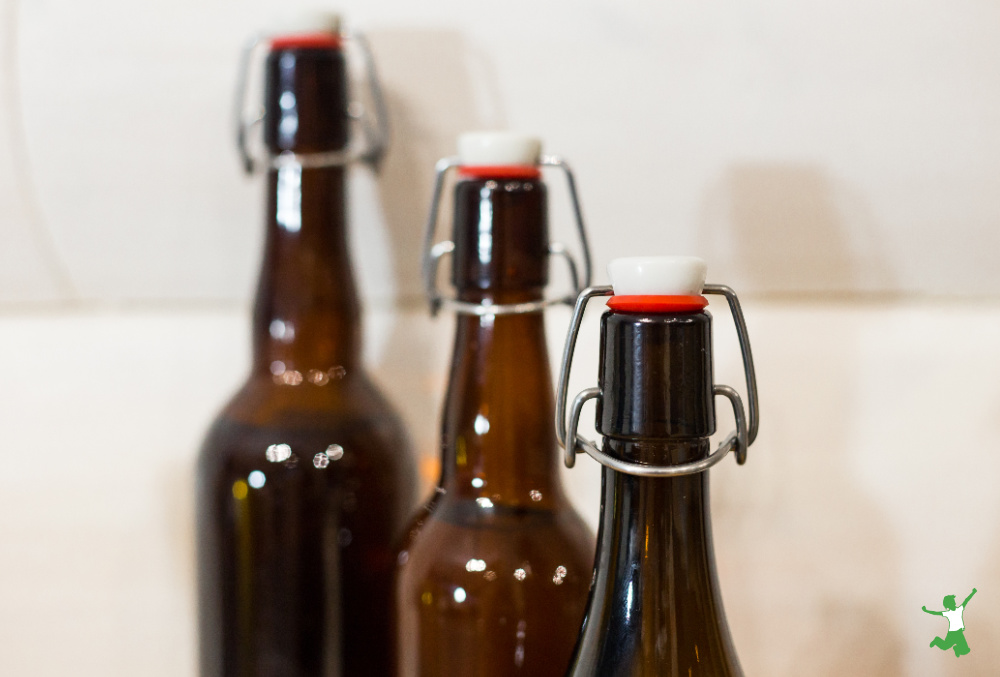
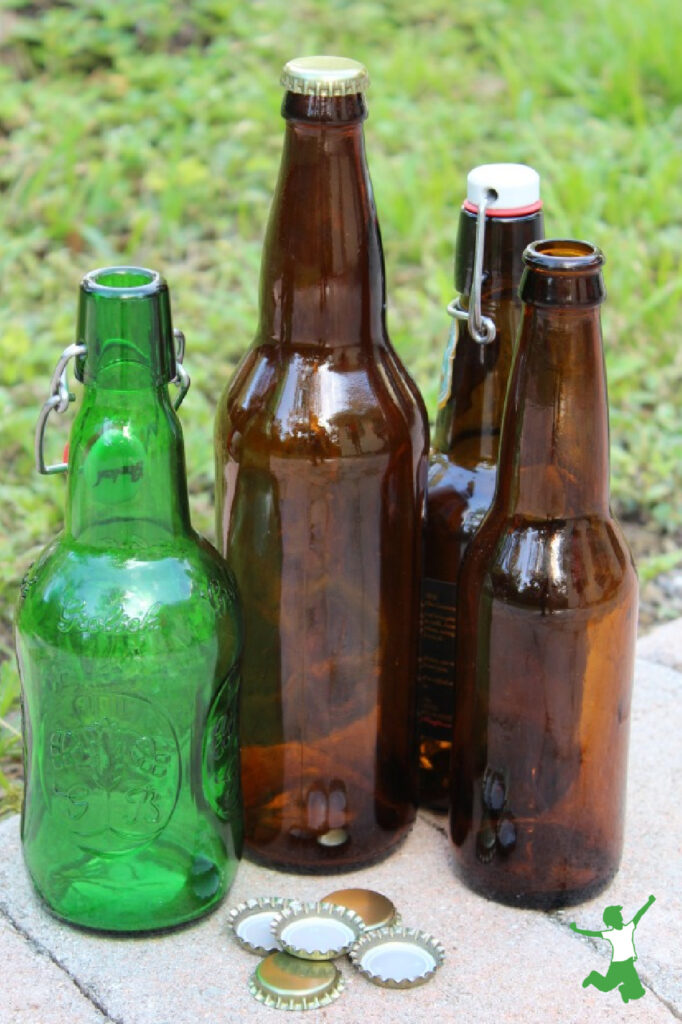
- Where to find the right bottles
- How much to fill them
- How long to leave them on the counter
- Safe opening without an explosion and a big mess.
Note that you should only consider bottling after the initial fermentation process is complete.
In other words, bottling is an extra step to achieve extra fizz and probiotics if desired.
In other words, secondary fermentation of cultured beverages is not necessary if you are already enjoying your homemade drinks just the way they are.
Pressed for time?
Try this 5-minute homemade soda recipe that my son invented and taste-tested as his school Science Fair project!

How to Bottle Fermented Beverages
How to bottle homemade fermented beverages for extra carbonation and fizz on par with commercial sodas.
Ingredients
- 2 quarts homemade fermented beverage see list above for ideas
Equipment
- 8 12-ounce homebrew bottles
- 8 bottle caps and capper
- 8 swing top bottles with attached cap optional (if above equipment is not available)
Instructions
-
Thoroughly wash and dry homebrew bottles with warm soapy water. Do not use the dishwasher.
-
Fill each 12 ounce homebrew bottle two-thirds full (about 8 ounces). In other words, do not fill beyond the lower neck of the bottle. This leaves ample room for carbonation so the bottles don’t explode and blow off the caps!
-
Attach bottle caps with capper -OR- secure caps on swing top bottles securely.
-
Leave on the kitchen counter for 2 days.
-
Refrigerate for a full day to make sure each bottle is very, very cold.
-
Open each bottle only when very cold and crack each cap slowly to gradually release the pressure from the carbonation without making a mess. I recommend opening the bottles in your kitchen sink.
Recipe Video


watch out – they can explode! 🙂
I still don’t get a lot of bubbles when I bottle my water kefir. I even got new grains thinking that was my problem. I have tried the gosch bottles and the bottle caper too:(
I am still concerned with the sugar because even after two days fermenting and 2 days on counter in capped bottles- they still sat sweet to me. I am trying to come off of alot of sugar.
Any one else think this?
Hi Teresa. I live in Saskatoon, Saskatchewan Canada and I have been following Sarah’s blog for a couple of years now. I have found that when making any of the fermented drinks Sarah talks about, I have to increase the second fermentation time substantially to get any bubbles. If she says 2-3 days, I leave it for 4-6 days. After 4 days I’ll even open the bottle to see if I have enough bubbles. If not, I will leave the whole batch for a couple more days. Also, I add a couple of tablespoons of fruit juice to each bottle in the second fermentation. I saw that someone was adding cocoanut sugar, I haven’t tried that but I like apple/pomegranite juice blend. The drinks are always a bit sweet but not overly sweet. I think that’s normal.Yum!!
Donna
Thank you for the advice! Yes I may need to leave my fermenting alittle longer which would take care of the sweetness too. I keep forgetting Sarah lives in Fla and it is much warmer. My milk kefir would always ferment in less tha 24 hrs but the water kefir takes longer. This last batch I put a couple fresh blueberries because I think it was working better with fresh fruit. Thanks again!
Thanks, Sarah
This is another great video. I make a few gallons of kombucha per week. I store it at room temperature in grolesh (spelling) bottles. They still have a small amount of fizz at room temp. They have tons of fizz if I add a 1 ” piece of fruit- such as peach or melon, and then explode when opened. I will try to then refrigerate them, and so hopefully they then won’t explode and lose half when opened.
I am thinking about getting a commercial sized refrigerator so as to cool them all . My two refrigerators are full of other things. My large family drinks tons of kombucha. Great video !
You leave yours out 2-3 days to get fizzy, in Florida?! Even here in Michigan, if I leave it longer than 18-24 hours the top blows off when I open it, LOL! 🙂
Kel
does it have anything to do with sea level?
Great piece – I have been making water kefir but I’m looking forward to trying other techniques. Here’s a story I wrote about my experiences as a beginner: http://alicedishes.com/harnessing-microbes-to-make-water-kefir/ Now I am addicted!
Thanks so much for sharing, I really want to start making our own kombucha soon, but didn’t know where to start. I know it will certainly be better than paying 4$ a bottle for the stuff at whole foods.
Great video.
I find that for my kombucha I get the best carbonation when I use tapered wine bottles. They don’t have the typical bottle shape with a shoulder and are usually used for white wines, especially styles from cooler climate grapes like Riesling and Gewürztraminer. I think I’ve also seen lambic beers in bottles in this shape and some sake or plum wine bottles.
I just hand cork the bottle with the original cork that I didn’t screw all the way through when removing it originally. I’ve not had any blow outs from it not being tight enough.
Anyway, I think the shape of the bottle does something to discourage out gassing when they are opened so more bubbles end up in my kombucha.
Hope that’s helpful to someone.
I love the phrase “Plain water pales in comparison” it made me laugh!
Sorry, spelled his name wrong. I meant Konstantin.
Hi Sarah!
Great video! There are also sources online for swing top lid bottles. Do you find that the bottles need to be cleaned with a bottle brush after fermented beverages have been in them? This is off topic but are there going to be more weight loss posts by Konstyntine?
I’ve read you don’t count calories. I don’t either, I think it would be difficult as I cook everything from scratch but I was wondering to lose weight ( I’m about 15 pounds heavier than I’d like to be at 130 pound 5’4″) do you eat enough to not be hungry or should I be getting really hungry before I eat? Thanks so much Sarah!