This essential and complete guide to dry brining meat with salt, herbs, and spices prior to cooking results in meat that is tasty, juicy and tender when following these easy instructions. 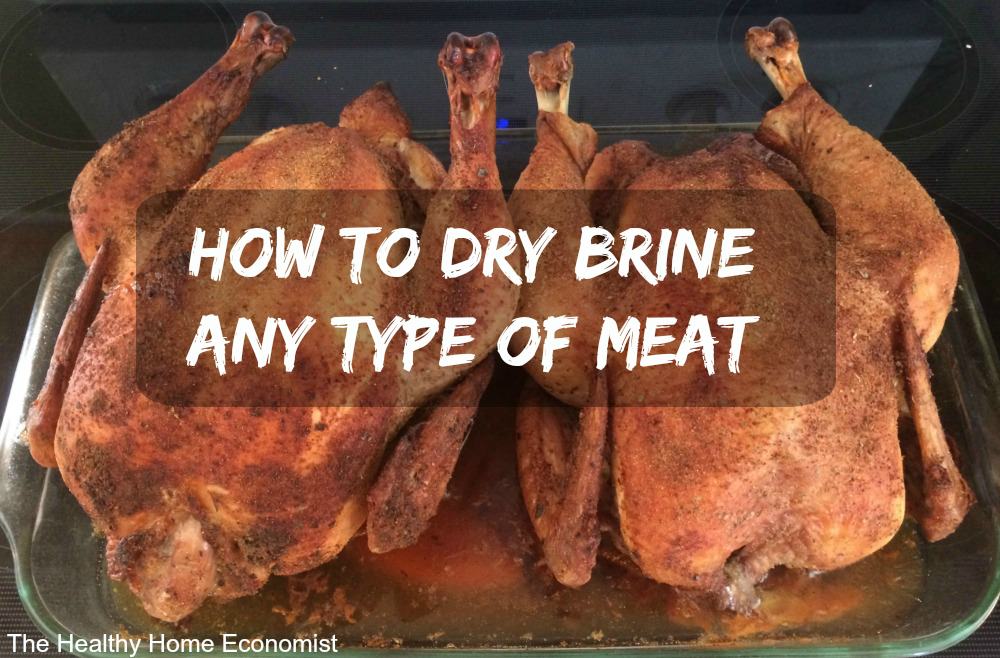
Years ago, when our family transitioned to locally raised, pastured meats, we had to learn a host of new skills for how to season and cook them. No more store-bought pre-seasoned, saline-injected McNugget mixtures for us! Crockpots, marinades, and wet brining became our thing.
The first year we purchased a local turkey, we were told it would need to be brined.
Brining? What is that, we wondered?
While we are not pirate folk, we figured we could handle putting together a salty bath for our bird. Brining at home is definitely preferable to store-bought poultry (even organic), which is usually injected with an industrial saltwater solution. In other words, “brine” is just a fancy word for saltwater, meaning that when you purchase poultry at the store, you are paying for a bunch of processed saltwater at the same time (and at the same price!) as the meat.
Conveniently, food producers don’t call this process brining, but instead refer to it as “plumping,” perhaps because they are “plumping their pockets” with additional profits from selling saltwater for the same price per pound as the meat itself! Estimates run as high as two billion dollars (yes billion!) per year being pilfered from consumers through this practice.
How much salt water are you paying for? On a large turkey, it can be many pounds worth of water and up to 30% of the total price you pay at checkout. This plumping thing isn’t just standard practice for chicken or turkey either. Some grocery stores and meat processors do it to pork as well. The water weight isn’t the only problem, as the plumped meat you end up eating means you are getting multiple times the USDA RDA (Recommended Daily Allowance)of industrialized salt – the type of sodium you want to avoid.
While Real Foodies know the benefits of real salt, you can bet your bottom dollar that these industrialized injections are the farthest thing from it, with tests showing over 400 to 800 mg per serving of processed sodium.
So, for both your personal health and pocketbook, poultry plumped with injected brine water is problematic to purchase.
Dry vs Wet Brining
Our first pastured turkey weighed in at almost 20 pounds. It required a 5-gallon stockpot to submerge the beast. Some people use food-grade bins or even coolers since the turkey plus water brine takes up so much space. The pot plus brine reached maximum poundage for our refrigerator, and as I carefully placed it on a shelf, I saw and heard the glass protest under the burden. The turkey turned out well and was well praised by guests. But I always remembered and have now read horror stories about the weight of a wet brined turkey shattering glass in many a fridge. What a dangerous mess that would be!
For a few years, we continued wet brining similarly until one Fall day a friend mentioned the traditional technique of dry brining. No massive amounts of water to slosh and spill (or dispose of!). Shorter cooking time. Superior flavor penetration. He ticked off a host of benefits. I was immediately intrigued and set about learning more and preparing to change our holiday practice.
Culinary Alchemy
Dry brining is some sort of culinary alchemy, taking flavors deep into the meat in a most mysterious manner. By coating the outside of a cut with a mixture of salt, herbs, and spices, a set of beneficial reactions ensues.
First, the salt pulls moisture out of the meat! Yes, out.
This may seem like a bad thing at first, but at a certain point, the meat then begins to pull this moisture back in, along with the salt and spice mixture. This pull-push of moisture allows the salt and spices to move deeply into the meat. It also changes the meat’s structure, tightly binding the moisture in its folds and improving the texture.
Benefits
There are four main benefits of dry brining meat versus the more typical practice of wet brining. These include:
- Much shorter cooking time with reductions by as much as one-third.
- Increased resistance to accidental overcooking (meat holds onto its moisture better).
- Superior flavor penetration, since the salt carries herbs and spices deep into the meat.
- Succulent meat texture, no rubbery or watery portions which can sometimes occur with wet brining.
Complete Dry Brining Guide
Intrigued?
Here’s how long you’ll need to dry brine various cuts of meat prior to cooking.
Smaller cuts: 1/2-2 1/2 pounds (steaks, roasts, breasts) – 12-24 hours
Medium cuts – three to eight pounds (whole chickens, large roasts) – 24-36 hours
Large cuts – Greater than eight pounds- 48-72 hours
Also, consider that cut shape matters a lot when dry brining. A longer, wider, but thinner cut will take less time than a rounder, bulkier, more compact cut. So a chuck roast needs less time than an equally sized rump roast. A spatchcocked chicken or turkey will take less time than a whole chicken or turkey. Adjust your brining time accordingly.
Another important note: you will do little harm going longer with your dry brine. The rules above are minimums to help ensure success. If a cut sits an extra day or so, it was never in our experience negatively impacted the meat or meal in any way. As long as you used sufficient salt, herbs, and spices, and the cut was not already older, it should also keep the meat safer than if it was sitting solo.
Steps
Start with a cut of meat that has not been “plumped,” pre-seasoned, pre-salted or otherwise processed in any way. This includes Kosher meat.
- First, make sure the meat is dry. Use a towel or paper towels to remove excess moisture from the meat. In our experience, this is easy with most cuts, except for whole pastured chickens and sometimes turkeys from small, local farms. These tend to have a fair amount of excess water from the water bath chilling process these farmers usually use and may require sitting out for a ten minutes or more on a towel to drain. For chickens and turkeys, this is also the time to remove any organs and the neck if they were tucked into the cavity.
- Next, for each pound of meat, mix 1/4 – 1/2 teaspoon salt and 1/8 – 1/4 teaspoon of herbs/spices for each pound (.45 kilo) of meat. Rub the meat thoroughly all over. Meatier spots need more of the dry brine, so especially focus on poultry breasts.
A few suggestions …
If you have never dry brined before, I suggest before doing it for some special occasion or on some super large cut of meat (like a Thanksgiving turkey or a standing rib roast), to do it on a smaller, similar cut, like a whole chicken or some steaks before moving on up. Since dry brining can use a range on the amount of salt and spices, you can also get a feel for which end of the range you prefer per pound.
Since dry brining changes cooking times, the first few times make sure to keep an eye on your meat. An added bonus to the shorter cooking span means meats take up less time in the oven on busier cooking days, like holidays.
May I suggest that after you dry brine a holiday bird that you roast it in a covered charcoal grill. This article on grilling a turkey contains the recipe. You won’t be disappointed.

Dry Brining Recipe
Basic dry brining recipe for any type of meat or poultry.
Ingredients
- 5 lbs (2.27 kilos) meat preferably pastured
- 1 Tbl coarse sea salt
- 1/2 Tbl Herbs de Provence
Instructions
-
Pat meat dry with paper towel.
-
Thoroughly rub down/coat with brining mixture.
-
Place into a large bag (sources) and seal.
-
Every 12 hours rub meat down through the bag.
-
Dry brine chicken and roasts for 24-36 hours, steaks and smaller cuts for 24 hours, and turkey for 48-72 hours.
Recipe Notes
Adjust sea salt and herb mix used depending on how much meat you will be using: ¼-½ tsp of coarse sea salt and ⅛-¼ tsp of herbs/spices for each pound (.45 kilo) of meat
Dried sage, thyme, rosemary, and marjoram are great herbs to use (organic if possible as non-organic spices are frequently irradiated).
Herbs de Provence is a simple mix to use for dry brining that is delicious. We also love the Thai organic seasoning blend from Frontier, though it is one among many organic seasoning blends you can try and use instead of making your own.
Since the amount of salt and herbs is somewhat up to preference, I encourage people to try out dry brining on some chickens a few weeks before Thanksgiving or Christmas to see what they like best.
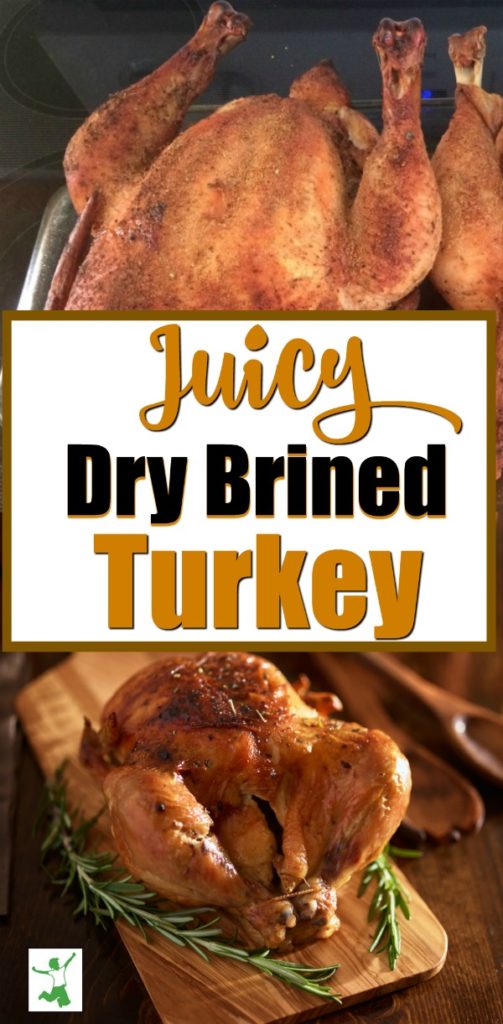
Three Reasons to Dry Brine the Holiday Bird
Still not convinced to try it and want to stick with tried and true wet brine? Here’s a summary of the three big reasons to give the dry brine a chance this year instead.
- Takes turkey prep out of the craziness of the big day due to significantly shorter cooking time.
- Removes the danger and potential mess of having a massive, incredibly heavy pot of sloshing water in your fridge. Might even save your back from going out!
- Results in a more evenly and thoroughly flavored bird, with improved moisture and texture.
Pitfalls to Watch Out For
While a much easier process overall, there are a few things to watch out for when you dry brine. Here’s a quick summary of the caveats mentioned earlier.
- Dry brining reduces cooking time so watch the meat carefully.
- Don’t get a kosher (pre-salted) or pre-seasoned and salted turkey. You want a truly au-natural bird.
- Meatier spots need more dry brine, breasts especially.
Will You Give it a Try?
Have you ever dry brined or wet brined pastured meats? If so, please let us know your experiences and what differences you noted between the two methods. Did you prefer one over the other?


Sarah,
on a larger cut of roast that I’m using (bottom round flat) do I apply the dry brine on the fat of the roast even though I’ll be removing it for serving, or do I remove fat before I put on my dry rub?
I dry brined a chuck roast using the instructions on this website. It was really tender and not salty at all. When measurements are given for the amount of salt, I used Diamond kosher salt which is about half the weight of Morton Kosher salt. You only need about ¼ to ½ teaspoon of kosher salt per pound of beef and 18 to 24 hours in the fridge. Unless it is a steak you are brining, I wrap the beef in plastic wrap. I’ll leave the wet brining for fish from now on
I’ve been dry-brining turkey for many years. My guests insist on it! Highly recommended. Thanks for this great article!
I am interested in the use of baking powder in the dry brine, We used it with dry brine in preparing our Thanksgiving bird delivered a marvelous juicy crisp.
skinned bird
I usually use a wet brine for pork bellies before I put them in my smoker. I use my own brine recipe and I brine for 3 – 5 days in a commercial grade food safe bin that I put in my outside refrigerator. I get the best bacon you have ever tasted this way. However, as you mentioned, I am somewhat concerned about the weight and have decided to try a dry brine. The pork bellies run about 12 – 15 lbs and are 2 – 3 inches thick, I cut them into pieces about 20 x 24 inches to fit my smoker racks. After reading your article I suspect 72 hours of brine time will be just about right. Do you have any further suggestions?
The instructions don’t say whether or not to put the brining meat in the fridge or leave out on the counter as one commentor suggested. I assume fridge, but would like to know Sarah’s response.
Always refrigerate dry brined or wet brined meat.
there is actually a word for that: Cure.
Do I need to rinse off the brine before cooking?
No, you do not need to rinse.
Thanks for this article. I have used the concept several times with great success. Thanks again
I’ve been dry brining for some time now and find it to be a real improvement. We salt at the lower end of the range you give. It took two or three times to find the exact amount we like best. But once we got that dialed in, we do it with confidence. I do have to say that with steak, we find that a day or two extra in the fridge uncovered helps really dry things out and the browning is much improved. I do, however, have a question. Have you tried dry brining meat that you are freezing? What was the result? Does the meat get mushy? Any adverse effects?