Easy instructions for how to activate live kefir grains that are dormant and why pasteurized milk surprisingly works best to speed the brief revival process even though raw milk is clearly superior nutritionally and digestively.
Homemade, 24-hour kefir is truly a miracle food when it comes to healing the gut. In my view, it is very difficult if not impossible to achieve proper intestinal balance without it.
To get the most benefit, however, it is crucial to always choose live kefir grains over powdered starter. Commercial kefir is made with powdered starter and fermented for only a short period of time…literally just a few hours in most cases.
Hence, store kefir is greatly inferior to homemade due to a lack of beneficial yeasts, far fewer probiotic strains, and overall low potency. This is the case even if the brand is grassfed and organically certified.
Where to Find Live Kefir Grains
Once you get your head around the fact that you are going to have to make kefir yourself to get any real benefits, the question is, where to source live grains?
If you are lucky enough to have a friend who can share some with you (these critters grow a bit with every batch, so you can share), then you are good to go.
If not, you are going to have to buy live kefir grains. This will necessitate that you reactivate them when they arrive in the mail.
In other words, you can’t use them immediately out of the package.
How to Activate Kefir Grains FAST
Mail order kefir grains need TLC and a bit of time to strengthen to the point where they can ferment a quart of milk in a 24 hour period.
The revival process requires, on average, about 36-72 hours to accomplish.
Raw versus Pasteurized Milk
One tricky point about activating kefir grains is that pasteurized, nonhomogenized milk works the BEST.
While raw milk does work, it takes longer for the kefir grains to regain strength.
Many people are surprised by this, so let me explain.
The reason kefir grains activate more slowly using raw milk is because it contains beneficial live probiotics. The good bacteria in raw milk compete with the kefir culture for lactose, which is their food. The competition slows down the revival process.
Using pasteurized milk allows the kefir culture to have all the lactose to itself. This is because pasteurized milk is a dead food … it has no beneficial probiotics in it that might interfere with the reviving grains.
In summary, preventing any competition for the milk lactose allows the kefir culture to strengthen and activate faster.
Once the grains are strong, it is best to switch to raw grassfed milk to make your kefir batches from that point forward. For regular consumption, kefir made with raw milk is superior nutritionally to kefir made with pasteurized milk.
8 Easy Steps
Once you have chosen the milk you are going to use to revive your dormant kefir grains, follow these steps below to activate them quickly.
- Place the grains in a wide mouth mason jar.
- Pour in one cup of fresh whole milk, secure the lid, and leave on the kitchen counter at room temperature for 12-24 hours.
- After the required 12-24 hours, pour in another cup of whole milk and resecure the lid.
- Let the jar sit on the counter for another 12-24 hours. You should now notice that the milk has become slightly bubbly.
- Remove the grains from the milk with a non-metal strainer (contact with metal weakens them over time) and place them without rinsing them off in a clean mason jar. You may use the partially fermented milk from the earlier steps in kefir smoothies.
- Repeat steps 2 and 3.
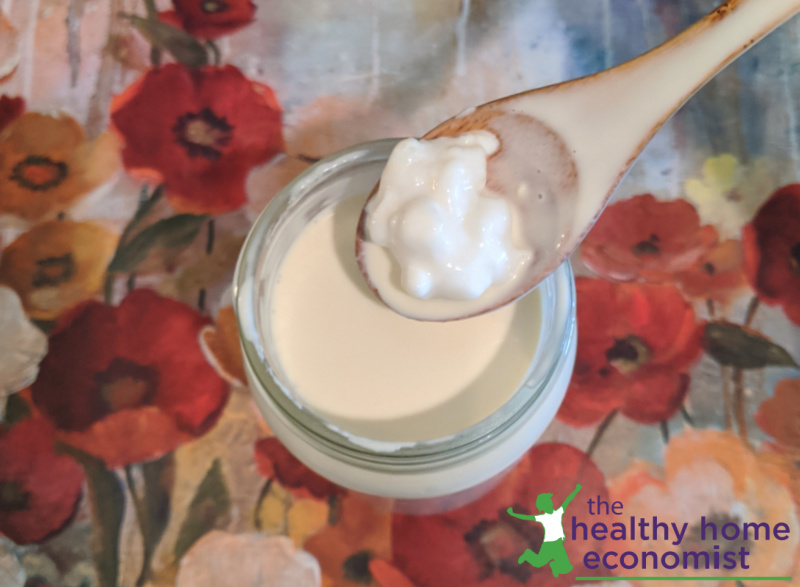
- Hopefully, after this second time around, the milk will be completely coagulated into kefir, which is the consistency of drinkable style yogurt. If the grains are especially weak and full coagulation has not yet occurred, strain the grains out and repeat steps 2 and 3 again.
- Once the grains are coagulating properly, they are ready to ferment a full quart of milk within 12-24 hours.
Proper Temperature
Kefir grains will ferment at any temperature between 40 and 80 degrees Fahrenheit.
Thus, you should be able to reactivate kefir grains and/or make kefir during any season of the year at whatever temperature you find most comfortable in your home.
I use milk right out of the refrigerator for convenience. No need to warm it slightly on the stove first.
Care and Storage of Active Kefir Grains
Once activated, it is important to take care of your kefir grains properly so they don’t go dormant again. Worse, if not treated right, they can die and stop fermenting at all. See the linked article for detailed instructions on how to accomplish this.


Thank you very much for this post Sarah. When Cultures for Health instructed me to use pasteurized milk, I couldn’t believe it! I was unsuccessful with 2 batches using raw milk. But with your explanation, now I understand and I think I was just being impatient with the grains.
in your instructions, for the first 12-24 hour window, how do I know in which hour I should add the second cup of milk? Can I do it anytime in that range, or am I looking for the milk to have changed in some way?
Thank you.
great post. best of luck