Pickled Garlic
Easy recipe for pickled garlic that will boost the flavor of dishes and can also be used medicinally as a natural antibiotic and anti-viral.
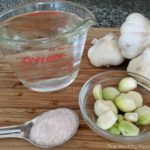
Ingredients
- 5-6 heads of garlic preferably organic
- 1 pint filtered water
- 1 Tbl sea salt
Instructions
-
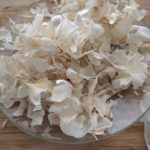
Separate all the cloves from each head of garlic.
-
Carefully remove the papery skin from each clove.
-
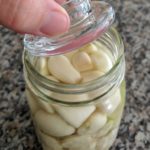
Place all the cloves in a mason jar and fill with filtered water mixed with sea salt.
-
Place a fermentation weight on top. This will keep the cloves at the bottom of the jar when the water is added. This is a simpler and more frugal option than expensive Pickl-It jars and anaerobic lids.
-
Make sure at least 1 inch is left for air at the top of the jar.
-
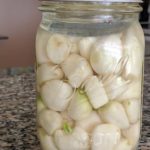
Close the lid tightly and place in a cool pantry or cabinet for one month. Best to label the lid so you remember when the fermentation began.
-
After one month, transfer to the refrigerator. Consume the pickled cloves as needed to flavor dishes and as one of the best natural antibiotics.
Recipe Notes
Do not use large elephant garlic, as it does not have the same therapeutic value.
You may wish to check on the pickling garlic every week or so during the month long fermentation. If the water level has decreased, add more brinewater as needed (1 Tbl sea salt per pint of filtered water).
**Open the jar over the sink as the pressure can build up substantially from the fermentation.
If you get sick during the time the garlic is pickling, feel free to dive into those cloves early. They will probably still be a little hot, but they will be highly therapeutic nonetheless.